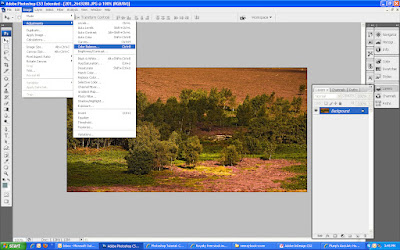
 01. Take a picture and open it in Photoshop. Please respect copyright laws.
********************************************
 02. Go to Image > Adjustments > Color Balance.
********************************************
 03. On doing so, a Color Balance window will open. In this window, You can adjust the three colors Cyan, Magenta and Yellow using their corresponding sliders as seen in the screenshot. Or you can also adjust these colors by typing in their levels using from the keyboard. The value of each color level can range from ‑100 to +100.
********************************************
 04. With practice, you can train your eye to guage which clor is over- or underused in the picture and can then compensate for or reduce that color in the picture as explained in Step 3. In this tutorial, color red has been overused in the picture and we’ve used the slider control to undo this error.
********************************************
 05. Now, take another black and white picture and open it in Photoshop. Please respect copyright laws.
********************************************
 06. Open the Color Balance window again as explained in Step 2, select the Highlights radio button this time before adjusting the color
 settings. Now, you will find only the highlighted parts in the photo getting colored.********************************************
 07. Select the Shadows radio Button and adjust the
 color settings. You will see only the darker parts in the picture getting colored.
********************************************
No comments:
Post a Comment